It’s now time to start learning how to repair used road bikes! In this first lesson we will focus on the brakes. Used road bikes, or really any used bike, typically has brakes that hardly work, if at all. This is mighty important if you plan on riding it! Unlike most tutorials and guides online, I’m going to keep it as simple as possible with as few words as possible. Then there will be supplemental info at the end if you have any problems. With no further ado, lets get to work!
Tools needed:

Tools
A. Crescent Wrench – to loosen hex nuts.
B. Cable Cutter – to cut wire with.
C. Allen Wrench(es) – if you are changing brake pads (mine was a 5mm).
Out with the old!

1. Loosen the screw holding the end of the brake cable.

2. Pull the cable and cable jacket out of the brake.

3.1 Squeeze the brake lever.

3.2 Release the brake lever.

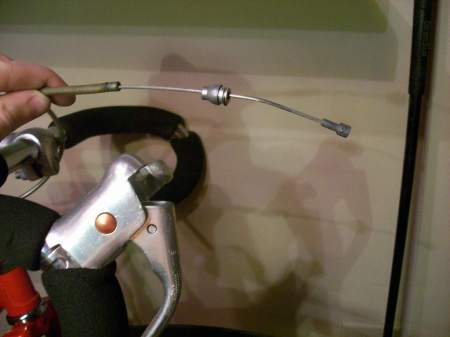
4. Pull the end out of the lever.

5. Jiggle the wire until you get it completely out of the lever.
6. Pull the cable out through all the cable guides until it is completely free from the bike.

7. Remove the cable from the jacket and set aside the jacket grommet.
A Fresh New Start

8. On the new cable...Separate the cable from the jacket and replace the grommet.
9. While you have the jacket removed, cut the JACKET ONLY to the proper length using the wire cutters. (we’ll cut the actual cable later)

10. Feed the new wire back through the lever.

11. Play with the end until you get it set back in the lever.

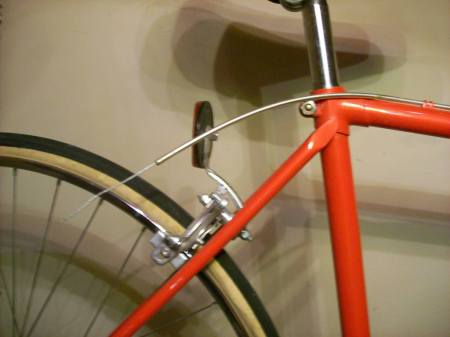
12. Feed the new wire though all the cable guides on the frame and on through the brake assembly. There is a small hole in the bolt going through one of the brake arms, feed the wire through it and just get the nut finger tight.
13. Pull the wire tight and double check to make sure the jacket is seated in all the grommets.
New Pads
I’m also going to discuss changing the brake pads. If you are NOT changing brake pads, skip on down to the “Finishing Up” section. If you ARE installing new brake pads, lets proceed.

14. Loosen the pad nuts.

15. Remove both pads and get the new ones ready.
As you can see, there is a big difference in the newer pads. Not only are they larger, but they will align with the rim much better due to the curved washers that come with them. I got my pads awhile back so the exact ones are probably not still available but there are plenty of great ones to choose from here. Just make sure you get the threaded ones (assuming your bike has the caliper style brake, which most do).
16. Check that you have the appropriate pad on the correct side (they should be marked in some way, if not then it does not matter). Slide the washers on just as they come (there should be two on each side of the brake arm), then thread the nut on finger tight.

17. This part is kind of tricky. Press the brake to the rim with your hand while holding the pad straight on the rim. With your other hand, tighten the nut with the wrench. Do the same to the other side. When you are done, it should look something like this...
Finishing Up

18. Adjust the barrel nut till it is about half way out.
19. This part is a little tricky as well. Make sure everything is still seated well. Then, with one hand, squeeze the brake pads to the rim and hold it there. With the other hand pull the wire tight, then torque down the compression nut. Another set of hands is useful here if you have a friend that can help, but it’s not necessary.
20. At this point, check the brakes and see if they work. If you held the pads tightly they should be locked on the rim. Adjust the barrel adjuster back in as you squeeze and test the brakes. It will come to a point where the brakes are just slightly off the rim and allow it to move, but when you barely squeeze the brake they lock up. It up to personal preference how you want the lever adjusted. Just keep playing with the barrel adjuster until you get it how you like it. Once you’ve got them how you like go ahead and cut the wire.
That’s all there is to it! If you are keeping/changing the other set of brakes as well, just follow the same procedures.
Extra’s
Below are a few supplemental photos and other tips.
Tip 1
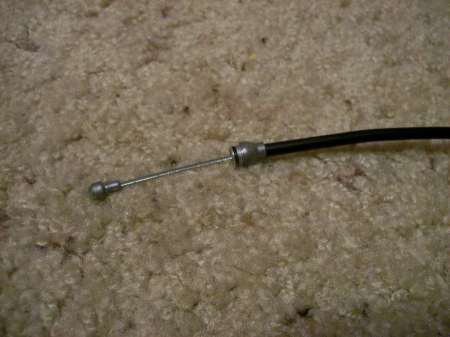
When buying the new cable, make sure it has the same end as your current brake cable. You can also get a great variety of brake cables here.
Tip 2
Some bike have cable guides that are set up for stripping some of the housing and running bare wire. Personally, I prefer to leave the entire wire in the housing and just zip tie the cable to the bike frame, as opposed to running it through the guides.
Tip 3
Using sharp cutters is very important. It’s vital that the end of the cable does not get frayed, otherwise it will be very difficult, if not impossible, to feed it through the compression bolt.
Tip 4
If you are having a really hard time removing the old cable you can simply cut it off. Of course, this is assuming you are going to dispose of it. The way explained above just helps familiarize you with how the brake cable fits into the lever and caliper, thus making it easier to understand when installing the new cable.
Tip 5
Go for a ride afterward to test them out and take pride in a job well done!
What if I do not have caliper brakes? What are the others called? How do I buy them?
Most likely you have v-brakes or u-brakes. See this link to find out which matches yours… http://sheldonbrown.com/cantilever-adjustment.html
All these brakes are still available from various online stores (do a search, a few online stores that come to mind to look at would be pricepoint.com, jensonusa.com, webcyclery.com, amazon.com, ebay.com, and blueskycycling.com) and some of the more popular brake types will be available at local bike shops.
The repair process is still essentially the same for any type of brake, you’ll just need to analyze how the brake cable attaches to the brake, this will be the only significant difference.
This is the first time I commented here and I must say you give us genuine, and quality information for bloggers! Good job.
p.s. You have a very good template . Where have you got it from?
Thank you for the kind words, I’m glad you enjoy it!
The template is the Contempt theme from WordPress but with my own header that I made myself using Photoshop.
Hi, nice day. Amazing article. You might have gained a new subscriber. Pleasee continue this excellent job and I anticipate more of your great websites.
I have an old Ross bike, and the rear brakes don’t really work. the cable isn’t really tight on the back. the rubber pads aren’t worn out either. I was wondering if I should switch the entire rear brakes. Does it matter that my Ross bike is from the 70s? Can I buy any brake kits and will it properly work on my bike? Thank you
The old caliper style brakes didn’t work very well in general. Depending on what kind of mounts you have on your bike I’d recommend either buying a near complete set or looking for an adapter to retro fit newer style brakes on the old bike. Otherwise, making sure they are set up properly can have a huge impact so do some research before just scraping the old ones.
Thanks for the help, took me a while to find this site (after buying a beautiful but run down 80s road bike) but I’m so happy I have, bar a new inner tube I’m now ready to role! Thanks very much!
I experimented with viewing your website on my iphone and the design doesnt seem to be right. Might want to check it out on WAP as well as it seems most smartphone layouts are not working with your web page.
Thanks for the heads up! I’ll look into it!
Pretty! This has been an incredibly wonderful post.
Many thanks for supplying these details.